Wednesday, January 8, 2014

Update Samsung Galaxy S3 to 4.2.2 Kitkat

For those of you who have been waiting for a KitKat ROM, you long wait may just be over as CM11 ROM now has everything working out of the box for ALL Galaxy S3s including AT&T, T-Mobile, Sprint, Verizon, Canadian, Cricket, US Cellular, MetroPCS, GT-i9300, and GT-i9305.  The latest CM11 [cm-11-20140108]ROM also includes the latest Android 4.4.2, meaning you will be right up to date with bleeding-edge of Android.


Download:

- Download latest KitKat [4.4.2] jan 07 2014

- Download latest ClockWorkMod with Odin

- Download gapps for 4.4.2

Steps :

Install ClockWorkMod 

- Switch off your phone
- Wait for few sec after switch off and press Vol Up, Home , and Power Up button 
- Click continue which shows downloading in screen

- Start Odin in your computer
- in AP choose the ClockWorkMod downloaded
- plugin Android phone with usb cable now
- when !!Added!! is shown in Odin , you are ready to start odin process [make sure that usb driver is properly installed ]
- within few second, it shows complete message, now your device is ready to install new rom 4.4.2 downloaded

Notes. [You must install latest CWM inorder to install latest roms else it shows error while installing from sdcard. For me it shows Status 7 error message which was big headache for me as i was trying to install 4.4.2 using old version of CWM but problem solves the latest CWM]


Install Kitkat

- Make sure that your device is properly backuped. I personally use Super Backup for contacts,sms, apps,bookmarks...
- copy the downloaded rom ie kitkat 4.4.2 in your sd card
- copy downloaded gapps in your sdcard

- now shutdown your phone
- press Vol down and Power button
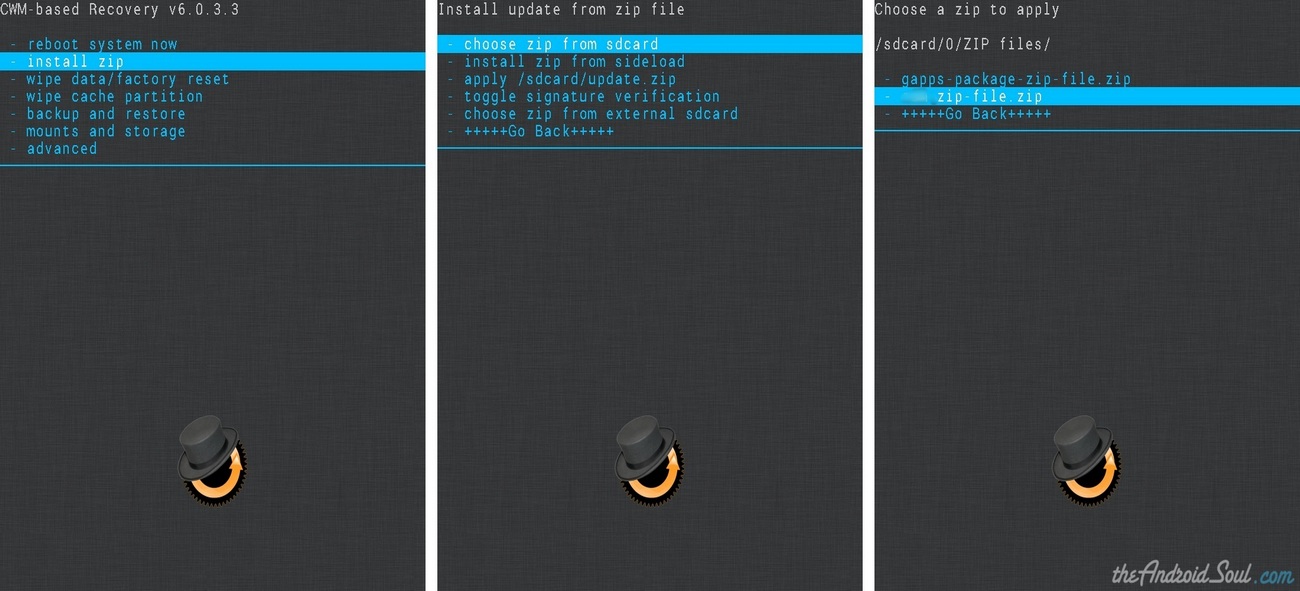
- it shows CWM screen from where you can install roms
- first factory reset your device
- and choose install zip
- choose the location where you keep your downloaded rom in your phone.
- install gapps samely
- reboot your phone
- hurray you are in 4.4.2

Tuesday, January 7, 2014

Update Samsung Galaxy Nexus (GSM) to Android 4.4.2 KitKat with Official AOKP Rom

samsung-galaxy-nexus-aokp-official-kitkat-update


CUSTOM ROM INFO
NameAOKP Rom
Android VersionAndroid 4.4.2 KitKat (Launched on Dec 9 by Google).
Is this official?No.
StabilityGood enough for daily use.
CreditsAOKP Team

 INSTALL THE LATEST CWM/TWRP RECOVERY:

Samsung Galaxy Nexus CWM Recovery Installer – Touch edition:DOWNLOAD LINK | (Mirror)

  1. Prepare your phone:
    • Enable developer options: Go to your phone’s Settings » select About phone » Scroll to the bottom and tap on “Build number” seven times to enable developer options.
    • Enable USB Debugging: Open phone’s Settings » select Developer options » Tick the “USB debugging” checkbox (under Debugging section).
    • Connect your phone to PC with a USB cable and if a pop-up screen shows up on Phone asking you to Allow USB debugging for the computer, make sure you tick the checkbox and tap OK.
      Authorize computer for USB Debugging
    • xtract the installer file (using 7-zip, preferably). For touch edition, it’ssamsung-galaxy-nexus-gt_i9250-touch-cwm-recovery-installer.zip. And for Non-touch edition it’s samsung-galaxy-nexus-gt_i9250-cwm-recovery-installer.zip. You’ll get the following files, and one folder:
      • api (folder)
      • 1-click-cwm-recovery-installer.bat
      • adb.exe
      • AdbWinApi.dll
      • AdbWinUsbApi.dll
      • fastboot.exe
      • recovery-clockwork-6.0.4.3-maguro.img (or) recovery-clockwork-touch-6.0.4.3-maguro.img.
      • source.properties
    • Double-click/Run the 1-click-cwm-recovery-installer.bat’ file and follow the simple on-screen instructions like ‘Press any key to continue..’ to install CWM recovery on your Galaxy Nexus.
    • Once the CWM recovery is flashed successfully on your Galaxy Nexus GT-i9250, your device will reboot automatically.
      └ Note: In case the script gets stuck on < waiting for device > (see image below) for more than a minute or so, then it means you don’t have proper drivers installed on your computer for your Galaxy Nexus. Follow the drivers installation guide provided above in ‘Before you begin..‘ section for troubleshooting driver and other connectivity issues.
      Device not found 'waiting for device'
    • Try booting into recovery to verify if CWM recovery has been installed successfully:
      • Switch off your Galaxy Nexus.
      • Press and hold ‘Volume Up + Volume Down + Power’ buttons together to boot into bootloader/fastboot mode
      • Press Volume Down until the Start button changes to Recovery Mode, then press Power button to reboot into recovery mode.
    • That’s all!

      INSTALLATION INSTRUCTIONS

        DOWNLOADS
      Download the file given below and transfer it to a separate folder on your phone and remember the location.
        ROM FILE
      DOWNLOAD LINK | MIRROR | File name: aokp_maguro_kitkat_nightly_2014-01-04.zip (165.04 MB)
      For latest version of the ROM, check the original page →
        GAPPS FILE
      DOWNLOAD LINK | File name: aokp-gapps-kk-20131225-signed.zip (173.12 MB)
      Be sure to transfer the ROM and Gapps files you downloaded above to your phone and remember the location of the files. You will need to flash them now on your device using either of ClockworkMod (CWM) or TWRP recovery.
      We’ve got separate guide for CWM and TWRP recovery, so use the guide relevant to the recovery you have installed on your device.
      GUIDE FOR FLASHING ROM IN CWM RECOVERY
      1. Boot into recovery mode. If you’re rooted, the easiest way to boot into recovery mode would be using the QuickBoot app. If not rooted, then follow the instructions below:
        • Power off your device and wait for 5-10 seconds until the device is fully switched off.
        • Press and hold Volume Up + Volume Down + Power buttons together to boot into bootloader/fastboot mode.
        • Press Volume Down until the Start option at the top changes to Recovery Mode, then press Power button to reboot into recovery mode.
          └ In recovery, use Volume buttons to navigate Up and Down between options and use Power button to select an option.
      2. Create a Nandroid Backup from recovery. It’s optional but very important to do, so that in case something goes wrong you can restore to current status easily. For making a Nandroid Backup, go to Backup And Restore » Backup.
      3. Perform a full clean-up of the device (This will delete all apps and their settings and game progress). For this:
        • Select Wipe data/Factory reset, then select Yes on the next screen to confirm factory reset (screenshot).
        • Select Wipe Cache Partition, then select Yes on the next screen to confirm wiping cache.
      4. First Install the ROM file:
        • Select Install zip » Choose zip from sdcard (or external sdcard, you know where your files are) » browse to the location where you saved the file and select the ROM file.How to Flash File in CWM Recovery
      5. Now similarly flash the Gapps file.
        └ Make sure to first flash the ROM file and then the Gapps file.
      6. Reboot your device. For this, go back to the main menu of recovery and select reboot system now.
      That’s all. Your phone will now reboot and it will take some time as it’ll be phone’s first boot after installing Android 4.4, be extremely excited for this!
      Note: In case your device gets bootloop (stuck at logo while rebooting), just do a factory reset (step 3) and you will be fine.