Thursday, December 27, 2012

Change/Edit Google Account in GOOGLE PLAY without HARD RESET


Hi,
i am back with an old trick,actually this is an old trick but it is very very useful trick for them who changes their google id from GOOGLE PLAY Again and again so if you want to switch your google account in GOOGLE PLAY and if you do not want to RESET PHONE SETTINGS then you can follow this tip to add or change google account from GOOGLE PLAY.

Instructions:(You must have a rooted Phone)
1)Download ES FILE EXPLORER or ROOT EXPLORER from Play store
2)then go to INTERNALMEMORY/data/system/ and Delete Accounts.db file
3)Restart your phone and Done.

Tuesday, December 11, 2012

Android Newbie’s Guide to Rooting


What is rooting? 
Rooting a device is simply the process of gaining full, privileged, or admin control of a device thus allowing ‘root access’ or ‘superuser’ permissions. The process itself basically exploits a security weakness on a device, and in simple terms, grants the user executable permissions that are not otherwise there with a non-rooted device. Once a device is rooted, the user has complete control of the device from files on the device to being able to perform additional tasks that will truly make your device your own. These days, most devices are very easy to root. Also, keep in mind that the method(s) you run across to root your device has been done numerous times by countless others.
No technical knowledge is required for the most part – just basic computer knowledge if anything. I’m far from a ‘techie type’ but recently I sold a rooted device I had been using for the past year and began using my old device that wasn’t rooted (I hadn’t gotten the rooting bug when I used my previous device). In a matter of 15 minutes I was rooted without any prior knowledge of how to root that device. It’s literally that easy, for the most part.  Rooting has come a long way since the first Android smartphone, and rooting a device usually only takes a few minutes once a little bit of homework on the user’s part is done.


What are the benefits of rooting? 
As mentioned above, rooting gives the user ultimate control over a device. Imagine for a second that you couldn’t access, alter, or delete a file or program on the PC/laptop that you own. That really doesn’t make much sense does it? Granted you could mess some things up if you’re not careful, but you do have the right and are given that ability as the superuser or admin of your PC that you paid money for. You are the ‘root’ user of your PC or laptop. Now think, do you have complete control of the device that you’ve no doubt paid a lot of money for? If the manufacturer doesn’t limit what you can do on your laptop, why do phone manufacturers do it?
Beyond just the basic idea of knowing you have complete control of your device, rooting allows you to modify the phone to your liking. Do you hate all of that carrier ‘bloat’ that is preloaded on your device? Don’t just disable it, root it and get rid of it so you have more storage. Are you annoyed by ads like I am? Simply download an app from the Play Store (root required) and block those ads.
Additionally, if you don’t have a Google device, chances are that you get updates later than when Google officially releases them – way later, since they then have to go through the carrier to be ‘massaged.’ When you’re rooted, you can get those updates within a few days from developers that own your same device via a custom ROM. Speaking of custom ROMs, most ROMs include an option to tether. This is in fact a major reason why most go ahead and make the leap to root.
Other benefits include the ability to completely back up your system onto your SD card. This way if all else fails, you could boot into your recovery and load the backup that you have saved that is sitting on an external storage. Additionally, you can modify boot animations, fonts, and themes. No techie or coding experience is necessary. The beauty these days is that there are numerous apps that allow you to make these changes with a few selections of available options via the app(s).

Fact is, once you’ve made that leap to go ahead and root and you do a few things that aren’t normally ‘allowed,’ it can get addicting and you begin finding out what else you can do. It’s truly what Android is all about. For example, due to my phone being rooted, I’m able to run Android 4.2 with a phone that was released almost 2 ½ years ago. It was essentially abandoned by my carrier and Google regarding updates, but being rooted keeps it ‘alive.’ I don’t get the newest features like Photo Sphere since my phone lacks a proper gyroscope, but I can run 4.2 while enjoying most of the other benefits. You shouldn’t feel like you need a new phone to enjoy new software. It’s downright amazing what developers can pull off on older devices, and when you have root access, you can enjoy those benefits such as custom ROMs and kernels which make your device even better.


What are the risks of rooting? 
Okay, honestly this is what most of you want to know, right? I mean, if it were easy and there were no risks then everyone would be rooted. Aside from completely voiding your factory warranty, to be blunt, you can seriously mess up your phone – like to the point where you’ve made it into a glorified paperweight. That’s the big risk. I know, it’s a massive risk, but it’s kind of along those lines of a risk that has to be pointed out like all the risks that go along with taking medicine.
I mean, it’s a risk for me to drive to work each morning. It’s a risk to fly. I could go on and on. However, it’s more of a disclaimer than anything, and a heads up to BE CAREFUL. Additionally, once rooted with full control of your device, it opens your device up to the slim possibility of someone taking control over it like a hacker at a mall, bar, etc. However, there are measures to prevent this once a little research is done after you’re rooted.

Things to consider and/or to do before rooting 
So you know what rooting is, the benefits of it, and are aware of the risks. Now what? I’m not going to lie, there’s going to be some work involved if you’re new to this.
  • I can’t stress it enough: Google is going to be your friend. Search rooting your device. Do you have an older device? Maybe start with that one first. Then read, read, and read some more. Reading and doing your homework on your device prevents the risks we discussed earlier. The more you read, the more you’ll know going in and what to expect.
  • Stick to reputable websites that come up on your searches – ones you’ve probably already come in contact with before and visit frequently. When you run across terminology that you don’t understand, read up on that also. You’re essentially teaching yourself here.
  • XDA is an excellent source and usually has everything you need in one place that’s dedicated just for your phone. All of your questions have been asked and answered in there before, trust me. All you need to do is search. Granted it can be a little intimidating at first, but most forums for devices have a General section with a “Newb” thread, or two.
  • Did I mention reading? I’ve found that if you read enough, most sites you visit about rooting your device will become repetitive. It’s at that point that you should feel comfortable with what to expect in rooting your device.
  • Have a ‘backup’ plan. What happens if you’re not successful rooting your device? What if it ‘hangs’ in the process? If you don’t know what to do, you didn’t read enough in the beginning. At the very least you should already have a backup saved of your stock ROM/OS. Additionally, you should know exactly how to recover that backup and/or your factory settings should something go wrong. Most phones have a fail-safe that you can enter to go back to stock, access a backup, etc. At the very least, you should have a backup created before you begin and you should know how to access your recovery mode as well as the steps to get you back up and running. Whenever I create a backup, I test that backup to see if it’ll load properly.  After all, what good is a backup if it can’t load? Yes, it’s time consuming but you can’t be too careful, and honestly, if you’re not prepared to invest a little time, then rooting is probably not for you.
  • Make sure you’re looking at the most recent process to root your device.  When you search, filter by date and at least pull a set of instructions from the past few months, or the most recent you can find. Methods change over time, and often times those newer methods make it easier on the user to root. Make it easy on yourself and pull those latest instructions.
  • Read all instructions carefully – very carefully. Do not assume anything if you’re halfway knowledgeable in rooting. Read each step, and make sure it makes sense to you before you begin. Read the instructions multiple times and do each step one-at-a-time – slowly.
  • Speaking of slowly – don’t be in a hurry! It’s not a race. I know the adrenaline can get going, but take your time and be thorough. Again, do each step slowly and read each step carefully. Also, finding a guide that includes pictures will help tremendously.
  • Do your homework and read user comments. Most of the time, the steps you find to root your device will come in the form of a blog or forum. Read the posts under it. You’ll be surprised at how much additional you’ll learn from other users that are in the same situation as you – and reading those that are successful will give you confidence.
  • Ask questions. The good thing about the Android Community is that most of us are willing to help each other out since we were once newbies. In those forums and blogs, ask questions. Most of the time you’ll get a quick answer.

Yay! I’m rooted.  Now what? 
Let me just say this: If you don’t know why you want to root, then you probably don’t need to root. Read the section again about the benefits of rooting above, and do some research to make sure you know why you want to root.
  • First thing’s first – create a backup. You’re rooted and up and running with no issues so create that backup. Most devices, upon root, will have a modified recovery system.  Know exactly how to access that system (you may have to search the exact way to access it) and get familiar with it. Once familiar, create a backup. Test that backup, and if it loads properly you can now proceed with having fun. Also keep in mind that when you change recoveries (usually going from stock to rooted), your backup you made on the previous recovery will not work on the new one.
  • Know exactly how to access your recovery should you need to do so at any given time. This includes if the phone is off, or on. Also, some phones allow you to access what’s called a ‘Download Mode’ which requires you to have your device plugged into a laptop or PC. This mode is then used to push an OS onto your device via your PC or laptop. Believe me, one day you’ll have to use one of these types of recoveries. Scary, yes. But valuable that you’ll be prepared.
  • Read some more. Each phone is different, so read what’s available to you now that your device is rooted. As mentioned, this could include custom ROMS and/or kernels that allow you to get better battery life and other nice features. Also check out the apps that will work for all rooted devices that allow you to make tweaks to your device mentioned earlier.
  • Remember to not be in hurry with whatever you do with your phone once rooted. You have complete control and rights to everything on your phone, and one slip-up and it may not work properly.
  • Spread the knowledge. Once you’ve learned the ropes, help others.

Summary 
Hopefully this guide has helped you become more comfortable with the process of rooting. Again, it’s not meant to sway anyone in any matter. It should simply be used as a resource so you can make your own decision. There are many benefits of rooting, but if it’s not worth the risk then you obviously shouldn’t do it. Good luck, and happy rooting.

Android ROM and rooting dictionary for beginners


Diving into the world of rooting and modding your Android phone or tablet can feel like an overwhelming endeavor. Open a forum thread with some instructions and you’ll find yourself staring at all sorts of strange words and confusing combinations of letters. ROMs, Kernels, Nandroids, TAR images…what does it all mean?! We’re here to help! Below you’ll find the newb’s dictionary to the strange language of modding/hacking. This is not intended to be a technical definition of each concept, but an easy to understand explanation for the average Joe.
Get reading after the break:

Disclaimer: We chose NOT to put this “dictionary” in alphabetical order because we believe it follows a logical order from basic to more advanced hacking knowledge that will be easier for the complete beginner to follow and understand. 
Root - Acquiring ”root” is the process of gaining total control over your device. When you purchase your device, there are certain files and systems that you cannot access because they are blocked by the manufacturer. By aquiring root you gain access to these files, allowing you to modify, replace and even delete them. This allows you to take total control over how the software of your device looks and works.
Bootloader - Before you can root your device, you must unlock your bootloader. The bootloader is a line of code that is executed even before your Android operating system boots up. The bootloader’s code is specific for each make and model of the many Android devices. Bootloaders come “locked” because the device manufacturer doesn’t want you tinkering with the software that they worked so hard to optimize for that particular piece of hardware. Unlocking the bootloader allows you to tinker with the phone’s firmare, or even replace it with a custom firmware (aka: ROM). It is important to note that unlocking your bootloader will erase all data stored on your phone, essentially putting it back to a “factory reset” state, so you’ll want to save any pictures, music, or any other important files that are on your device.
Recovery - Once your bootloader is unlocked and you have rooted your device, you will need a custom recovery. A recovery is a piece of software that is called up separate from the actual Android operating system. Its purpose is to make changes to the Android OS at a core level, such as delete user data, apply updates and more. The stock recovery is limited in function, so if you are planning on modifying/hacking/rooting your phone, you will need to install a “Custom Recovery” such as Clockwork Mod Recovery. A custom recovery will allow you to make backups, restore them, wipe partitions, install custom software and more.
Backup / Nandroid - Once your custom recovery is installed, you will want to make a backup (also known as a Nandroid). A Nandroid is simply a complete and total backup of your phone. It will store all of your data, apps, settings, SMS messages, and more, basically allowing you to restore your phone to the exact state that it was in when you made the backup.
Wipe - Now that your backup is made, you don’t have to be afraid of making changes to your phone or losing data, since you can always restore it (just be sure to not delete the backup!). Now you can “wipe” your phone without worry. Wiping is deleting all the user data from your phone, essentially reseting it to its factory state. You can also wipe (ie: delete) other partitions of your phone like the cache partition. It is always recommended to wipe your phone before installing a custom ROM (we’ll get to that in a second). You can wipe your phone via the custom recovery you installed.
Flashing - Flashing is the process of installing some sort of software or code via your custom recovery.
Flashable ZIP - A flashable ZIP is the actual file that you install or “flash”  via the custom recovery to make changes to your phone’s software. It is a normal .zip file that contains the lines of code to modify your software. These Flashable ZIPs can be used to flash a ROM, Kernel, Radio, mod, and more, which we will define below.
ROM - A ROM is the main firmware or operating system that your phone runs. Just like Windows 7 runs on your PC, or Mac OSX runs on your Macbook, a ROM is the main software you interact with to use your phone. It includes all the system apps (messaging, email, phone), the launcher, the notification bar…everything really. Google’s Nexus line runs a “stock” Android ROM (meaning it’s unmodified) while manufacturers make significant changes to the look and feel of their ROMS before they ship them with your phone (for example: note the difference between the Samsung Galaxy S III’s software and the software on LG’s Nexus 4) . Code-savvy developers have taken the manufacturers’ code and created their own “Custom ROMs”. These ROMs can dramitically enhance the look and feel of your phone, and often add tons of useful features. Two very popular custom ROMs are CyanogenMod and MIUI. A ROM is made for a specific model phone and comes in a Flashable ZIP file that is installed (“flashed”) via your custom recovery.
Kernel - Unlike a ROM the Kernel does not alter the look and feel of your phone, but is a “deeper” line of code that rests beneath the surface, so to speak. It tells the software how to interact with the hardware. A custom kernel is a kernel that developers have added code to, in order to create all sorts of new options and abilities. They might add code to make the phone’s processor run at a higher speed, or make the battery draw less power when the phone is in “idle” mode. Kernels are like the soul of the software. They can be flashed in the custom recovery and the files are usually called Tar Images or Zimages.
Radio / Basebands / Modems - The radio / baseband / modem is a  firmware that allows your phone to connect to the wireless network. This firmware controls basic low-level functions of your phone like cell-network connectivity, Wi-Fi, and GPS. Oftentimes an updated radio / modem will help with signal strength issues, battery drain and more. The radio / modem firmware is specific to each device and carrier and is flashed via custom recovery.
Mod - A “mod” is simply a modification made to the phone’s software. This can include adding functionality or changing the visual layout of your phone, like moving the location of the clock to the center of the notification bar, or inverting the colors in the SMS app. Mods are usually Flashable Zip files that are flashed in the custom recovery.
Brick – A brick is when your phone won’t recover from a bad rooting/flashing process. Your device becomes unresponsive and unable to be restored…essentially making it a “brick” or a very expensive paperweight. Bricking your phone usually happens when you do not follow instructions carefully or if a device does not allow for root. Bricking your phone is a real possibility and risk in rooting and modding your phone, but it is very rare to occur, and most unlikely to occur if you simply follow the instructions.
Superuser (SU) – If you follow the instructions and root correctly, you will become a Superuser (SU), which means you become a complete and total admin of your device, allowing for most, if not all root permissions to be accessible.
Kang - A Kang is a ROM or mod that uses a significant portion of code created by another developer.
Overclock / Underclock - This means that you have installed a custom Kernel that has allowed you to speed up or slow down your phone’s processor speed. Most phones are clocked at a certain processor speed (ie: 2.4 MHz), but if you overclock it, you are allowing your process to push the limits by working at a higher speed. Overclocking will make your phone perform faster, but often comes at the expense of battery life. Underclocking does the exact opposite of overclocking. It makes your processor perform at a lower speed, slowing down perceived performance, but helps increase battery life.
Under Volt (UV) - Undervolting is a feature that is enabled in certain custom kernels. Undervolting lowers the amount of power your processor needs to perform at its normal level which, in theory, saves you battery life. The feature is known to cause issues in many phones.
APK - An APK is the file name for an Android application that can be installed on your phone. All apps downloaded from the Google Play store come as APK files. APKs can also be “sideloaded” by downloading them from outside of the Google Play store and placing on the phones internal or external memory. To install a sideloaded APK you need to enable that option in settings, then find the APK file on your phone and tap it to begin the installation process.
Odex / DeOdex - DeOdexing APKs is a way that developers optimize APKs (apps) to be compatible with different themes that themers have created..
Android SDK - Android SDK is a software development kit written by Google that enables developers to create applications for the Android platform. The Android SDK includes sample projects with source code, development tools, an emulator, and required libraries to build Android applications. In many cases, if you want to hack your phone, you will need to have the Android SDK installed on your computer. 
ADB - ADB stands for Advance Debug Bridge which is a tool that comes in the Android SDK. ADB lets you modify your device (or device’s software) via a PC command line. ADB is mainly for developers to create and test their apps, but it can also be used by curious hackers (like you!) to access your phone from your computer and run some commands via your computer’s command prompt.

Sunday, November 25, 2012

Advantages To Rooting Android


It has been brought to my attention that a lot of people are unaware of the full potential that they have in their hands and pockets for most of the day. The Android smart phonethat is in their possession is one of the most powerful things they own.

You are probably wondering, "Well if it's so powerful, why would I need to root it?"

Phone companies, while developing a phone, can either release the phone when they need to (if they think it will profit, or there is other competition being released), or they can work out all of the kinks and optimize it. Sadly enough, they rarely get optimized. That's where rooting come in.

Rooting is possible by a developer (thanks to the fact that Android is open source software). Think of the developer as the phone companies working overtime, and for no pay. They can tap into the full potential of your phone.

What rooting does: 

Rooting your phone does a number of things. It lets you get Superuser access to your root directory (where you can customize things like appearance or performance). It also allows you to flash(flash is rooting terms for install) a different kernel, optimized for the ROM of your choosing.

ROMs. ROMs are what I referred to earlier as the developers overtime. They create their own version of Android, a new Operating System, that customizes your smart phone experience. It can change the color of your icons, change the app dock, whether or not you have an app menu, etc. It can do basically anything. With a ROM you can uncap the full potential of your phone.

After ROMs there is apps. There are a number of apps on the market that only work while rooted. Screenshot apps, overclocking apps, etc. Just by rooting you are able to do so much more in the Market.


Speed and performance. Kernels are the things that tell your processor what to do, and how to do it. By changing that, you can change your processor speed and voltages. Meaning you are able to do what you love to do, only faster.

Looks. If you have the latest and greatest Android smart phone, you can't deny wanting eye-candy. It's your desire, and the reason you enjoy Android so much. When you root, you can take any imperfections out. If you think it would look better with a blue theme instead of a green one, or you want your favorite color everywhere, you can do it. If you don't like the default layout of the phone, or the styling, you can change it too. You can even make it look like an iPhone. (Though I wouldn't know why you would.)

Customization. This ties into the looks and speed and performance sections. Being able to say that no one around has the same phone as you is nice (iPhone users reading this don't know what it's like). But the moment when you do see someone with your phone, and you can still say your phone is different, is priceless. It gives people warm fuzzies inside.

Now that you have read that and know that you want to root, what next? This is the part where you head over to XDA Developers, go to the top right, and type in your phone. From there, you can find guides on rooting, installing ROMs, and tips and tricks. The best ROMs are the ones that people try to port like MIUI, Cyanogen Mod, and others depending on your phone.

Android Battery Life Optimization Guide


If you have just purchased your first Android smart phone, do not panic about what I am proceeding to tell you. We both know you will be on your phone for countless hours because it is such an upgrade that it is unbelievable. However, your battery will not last long. I know, tragic. Luckily, I can help you make the most of it without spending a dime.

First off, you need to limit what resources are being spent (resources being your battery).
Android Battery Life Optimization


Unknowingly, the #1 cause of short lived batteries is yourbrightness level.

This is when you go into Settings -> Display -> Brightness and turn off auto brightness on your phone. Then set it to a consistent setting to where you can see easily in a moderately lit room. This will undoubtedly increase your battery life tremendously. It might even benefit your eyes a little too.

Second step is to get into the habit of toggling your WiFi.

When you are out and about you do not need WiFi on. It will just spend precious resources trying to find what isn't there. Go to Settings -> Wireless & network settings and make sure it is off.

Step three is GPS. It is the same as WiFi, it's only useful while you're using it. So when you are about to use it, turn it on. And when you are done, turn it back off. Go to Settings -> Location & security settings and uncheck "Use GPS Satellite ".

WiFi and GPS can be easily maintained by the Power Control widget. To get to the widgets, long press on your background and select "Widgets". From there, locate "Power Control" and select/place it on your home screen. From left to right the toggle selections you have are: WiFi, Bluetooth, GPS, Auto sync, and Brightness control. I prefer to have all of them off, except when I need to use WiFi, Bluetooth, or GPS to make sure my battery stays alive.

 The fourth step is to turn off Bluetooth, which you can do through Power Control, like I stated previously. You can also go to Settings -> Wireless & network settings and uncheck it there. 

Next, download JuiceDefender off of the Android Market.

With Juice Defender, you have to power to control and limit what has access to data while your screen is off, you have the ability to restrict multiple apps from accessing the internet period, and you can customize your settings between 4 different level restrictions. Despite what I have said earlier, do not download Advanced Task Manager, as I have stated in my newest Android Advantage article update.

After that, look through your Applications and check out which ones you really need. Delete any that you don't ever use, and your battery life will also improve. (Settings -> Applications -> Manage Applications)

major reason people's batteries die so much is Live Wallpapers. They look really cool, but since they are running 24/7, they drain your resources in a hurry. Long press your home screen and go to Wallpapers to change it.

Last but certainly not least, is rooting your phone. It is highly unrecommended by phone companies, as is voids the warranty, but it essentially modifies the Android Operating System, allowing people with significant tech know-how to customize and improve your smart phone. A rooted phone typically has no bloatware (apps that no one uses or are useless), which will improve the performance as well as battery life. They also can overclock your phone and improve the speeds of it as well.

Tuesday, November 20, 2012

Notifications on your android device

Some of the default icons that the status bar would have include the Time, Battery level indicator, Network strength indicator, Data network connection icon and Alarm all on the right side. There are even the connectivity icons shown in the status bar:
  • Wi-Fi icon
  • Bluetooth icon
  • GPS tracker icon
  • Airplane mode icon
  • “Network name” icon on the extreme left
The left side contains the instant notifications that appear in accordance to the functions. A limited number of notifications icons are shown in the status bar, and if it exceeds that number, an icon showing a Plus sign along with the notification count would show up.
Status icons android
Here are some of the basic status icons that frequently would appear in the status bar:
  • Mail icon: New Message on Gmail App
  • A Smiley: A new Text or Multimedia received message
  • An icon with Exclamation mark: Problem in delivery of SMS or MMS
  • Icon with “Talk” word: New Message on Google Talk
  • Phone icon: New Voicemail
  • Date in Calendar: Upcoming event listed in Calendar
  • A refresh icon: Data sync is in progress
  • A triangular icon with Exclamatory mark: Problem with signing into the account, or syncing
  • Storage disk with Exclamation mark: The storage SD card is full
  • Wi-Fi icon with Question mark: Open Wi-Fi network is available. This shows only when you have the Wi-Fi connectivity turned on.
  • A USB icon: Phone USB cable connective active
  • A Blue USB icon: This indicates that the phone is sharing its data connection with the computer via USB, which we call as USB tethering.
  • A Blue Wi-Fi icon: This indicates that the phone is sharing its data connection to the computer or other devices by becoming a personal Wi-Fi hotspot, and we call it Wi-Fi tethering.
  • A Blue round icon with a center dot: This indicates that the phone has multiple connections on at the same time.
  • Plus icon with a number: Multiple notifications not displayed
  • Green call icon: Voice call in progress
  • Blue call icon: Voice call in progress using the Bluetooth headset
  • Missed call icon
  • Green call + pause icon: Call on hold
  • Call with an arrow mark: Call forwarding is active
  • Music Play icon: Song is being played
  • File with “up” arrow mark: Uploading data
  • File with “down” arrow mark: Downloading data
  • File with a check icon: Download completed
  • A white key icon: Connected to a Virtual Private Network
  • A grey key icon: Disconnected from a Virtual Private Network
  • Triangle icon with up and down arrows: Network data limit threshold reached or exceeded
  • Market icon with Android robot: Update available for Application
  • Android robot with down arrow: System update available
  • SIM with Exclamation mark: SIM-card is not installed or placed properly
  • Micrphone icon with a diagonal line: The Microphone of the phone is muted
  • Sound icon with an X – The ringer of the phone is silenced
Status icons
There are several other icons that appear based on the applications that you download from the Android Play Store (previously Android Market). One of them is the Facebook messenger chat notification which appears just like the Google Talk icon when you receive any message from your Facebook friends.
The status icons in the status bar appear even based on the phone. For example, the Motorola Droid Razr would have the Data Manager icon always shown if you have the data network connection disabled.
Apart from the various status icons, one of the important range of icons that keep changing are the Data network connection icons which lets the user know about the network to which the phone is connected to, ranging from GPRS to 4G LTE. The icon with the shining or darkened arrow marks would indicate whether the data network connection is currently active or not.
Note: Many of the icons would just the users know the status of the phone or activity, but a few would take you to the particular app. You would need to check the Notification panel to see if there is any extra function or shortcut available for the icon that appeared on the status bar.

Tuesday, November 13, 2012

Android 4.2 – Build JOP40C – Heading to Nexus 7 Owners; Manual Update Here Read more at http://androidheadlines.com/2012/11/android-4-2-build-jop40c-heading-to-nexus-7-owners-manual-update-here.html#eliCU8HuHiyTIdSJ.99

November 13, 2012 |
That’s right, today is becoming a very busy day indeed for those that are Nexus fans and owners. With the news that the Galaxy Nexus is getting its fresh helping of Android 4.2 we were all wondering when the Nexus 7 would be allowed to join the party after all, the N7 did get to the Jelly Bean party first now, didn’t they? There’s no telling just how long you’ll be waiting for the update but the word is that the JOP40C, the same build for the Galaxy Nexus, is now making its way to Nexus 7s all over the place.
As always, there is an alternative to updating your device if you have absolutely no patience and quite frankly, we don’t blame you one bit. If you want to know how to get 4.2 on your Nexus 7 then read on and download this zip file before you get started!
  • First of all download the zip file above, do NOT rename this file.
  • Reboot your Galaxy Nexus while holding the Volume Down button – this will take you to the fastboot menu
  • From there, hit start and then hit the Volume Up key to get to Recovery and hit the Power Button
  • If you’re stock – with no CWM – then you should see a red exclamation point, after this hit the Power Button and the Volume Up button
  • From here, select “apply update from adb”
  • Then go ahead and open up a command prompt – terminal in Linux and Mac OS X – navigate to the same directory as the downloaded zip and input this command:  adb sideload 094f6629314a.signed-nakasi-JOP40C-from-JZO54K.094f6629.zip
  • Reboot and then you should be in Jelly Bean 4.2!
Of course, if you’re like a whole lot of other Nexus 7 owners out there and have gone a little rogue and installed a custom recovery and so on you can just simply copy it to your device and install it like you would any other zip!
Have fun and let us know how it goes in the comments!

Just Got Your First Android Device? Here Are Simple Answers To Your Everyday Questions by Joel Lee

The popularity of Android has been on a slow but steady rise. If you aren't using an iPhone, then your options are pretty limited: Blackberry for the business folk, Android for the everyday iPhone equivalent, then Windows Phone for the rest. Of those 3 alternatives, Android is the most popular. So if you're just starting off with an Android device, you probably have a few questions on how to proceed.
I'll be honest-I was a latecomer to the world of smartphones. Yep, I was using an old Samsung flip-phone until Fall 2011 when my contract renewed and I was able to grab an Android phone for free. As a newbie, I had a ton of questions. How do I do this? Where can I get that? The learning process was frustrating, but fun.
Here are some common questions that Android newbies might ask. If you're new to Android, the answers may help to ease your transition.

1. What is Android?

Android is an operating system based on Linux that has been designed for use in mobile devices like smartphones and tablets. The chief developer behind Android is Google, though they work in conjunction with the Open Handset Alliance, an organization that aims to develop and maintain standards for mobile devices.

2. Why Android?

There are a number of reasons why users could prefer Android over competing mobile operating systems:
  • User choice. Android can be used on hundreds of handsets and tablets. Instead of being pigeonholed into a particular device, users have the option of choosing which device they would prefer to use.
  • Customization. Because Android is an open source operating system, it can be modified by users. If you have the required expertise, you could very well change fundamental functions of the phone to fit your own desires.
  • Google. As the number two largest tech company in the world, Google has proven itself as a competent business. It's competitors-Microsoft and Apple-are also competent businesses, but some users prefer the way Google does business.
Of course, there are other reasons, too, but these are the main ones that often win users over. None of this is to say that Android is the best mobile operating system-that would be up to personal preference.

3. Where do Android's version names come from?

You may have noticed a delicious trend in the way Android likes to name its versions: Gingerbread, Honeycomb, Ice Cream Sandwich, Jelly Bean. As I type them right now, my mouth is starting to water.
In essence, Android names each successive version after a dessert that starts with the next letter of the English alphabet. That's all.

4. Do I need a Google account to use an Android phone?

Technically? No. The phone itself will work just fine without a Google account. However, if you want to take advantage of Google Play-to download apps-then yes, you will need a Google account.
Furthermore, Android actually uses Google accounts to sync phone data if you allow it to. This means that your phone setup is stored on Google's servers in case something goes wrong and you lose all of your data or something, you'll be able to go back to a previous version.

5. What are these buttons on my Android phone?

The majority of Android devices come with 4 hardware buttons that are built into the phone. These buttons are (in the sequence shown above):
  • Back: This button will take you back one step to whatever you were doing before your current step. For example, in a web browser, it'll take you back to the previous page.
  • Menu: Depending on when you tap this button, something will happen. Usually, if you're inside an app, you'll be presented with a number of choices. For the most part, it's used for accessing an app's settings.
  • Search: If you're on the home screen, this button will show you a search bar that takes you to search results in a web browser. If you're in a program, however, usually it will result in finding a specific phrase in that program (like the Find function in Word).
  • Home: If you single tap, this button will take you back to the home screen. If you hold the button, however, it'll show you a list of all running apps, allowing you to quickly switch between them or close them.

6. How customizable is Android?

The answer is, of course, very customizable. Once you get past the numerous choices of which device you want, you'll then be able to ponder just which software you want.
Like other mobile operating systems, Android has app functionality. Through Google Play, you can download and install various apps that improve your phone in different ways. There are: games to stave off boredom; productivity apps to keep you sharp and punctual; themes and skins that change how things look; and more.
But unlike other mobile operating systems, Android gives you the freedom to install new ROMs. ROMs are basically other versions of Android. Each ROM is unique in that they are each designed for different purposes. Some ROMs are designed to be fast at the cost of features; others are designed to pack in as many features as they can.
If you know anything about Linux, you can think of ROMs as different flavors of Linux. One ROM might be a Fedora, another could be Red Hat, while another ROM could be Ubuntu. Each is Linux, but they're all different in noticeable ways. Same with Android and its ROMs.

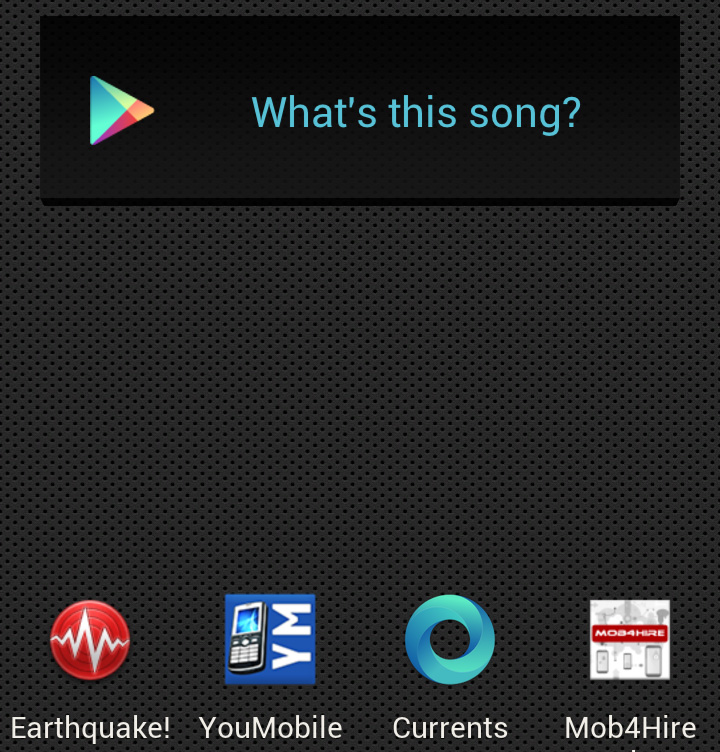
7. How can I customize my Android home screen?

You can customize your home screen by holding down on icons and moving them around or deleting them. There are three main ways to customize the home screen: wallpapers, app shortcuts from the app drawer, and widgets.

8. What's the difference between "home screen" and "app drawer"?

This distinction is one of the big differences between Android and iOS. In iOS, when you install new apps, they are placed directly on the home screen. If you fill up your screen, the app icons overflow into the next page. If you want to hide those icons, you can't-at least not without fiddling with your phone in ways that could void your warranty.
In Android, however, all of your apps are kept in the app drawer. The home screen, then, only contains shortcut icons to the actual apps. Think of it like a Windows PC: your programs are installed into various locations on your computer, but only the shortcuts that you want appear on the desktop. In the screenshot above you can see a home screen to the left (emptier), and an app drawer to the right (a grid full of icons).

9. And what are widgets?

Widgets are dynamic elements that operate directly on the home screen. Every widget looks different and can do pretty much anything that the programmer wants it to do. It sounds confusing, I know, but hopefully I can clear it up.
One widget that you might know is the weather widget. This widget sits on your home screen and displays the current temperature and current weather conditions. It updates over time depending on weather changes.
Another widget you might know is an email inbox widget. This one sits on your home screen and updates every time you receive a new email, allowing you to stay on top of your email as soon as it comes in.
Android comes with a few default widgets, but most of the popular ones are developed by hobby programmers and third-party developers. Widgets can be downloaded on Google Play.

10. What is the "notification bar"?

At the top of your screen, you'll see a bar that stretched across. This bar will display icons for all of the services currently running on your device, as well as showing you WiFi signal strength, reception bars, time, and more.
If you press and drag the notification bar down, it'll open up to show you a bunch of notifications (if you have any). This way, you aren't bombarded by popups and messages every time an app wants to notify you of something.

11. How do I transfer files from my computer to my phone?

The quickest way is to connect your phone to your computer using a USB cable. Once you enable USB storage on your phone, you can freely transfer files back and forth just as if you were transferring files to an external hard drive.
There are other ways, such as through Bluetooth or WiFi, but they are more convoluted and would require an article onto themselves.

12. How do I add apps to Android?

There are two ways you can add apps to your Android device: 1) through Google Play on your phone, or 2) through Google Play on the web.
If you open the Google Play app on your device, you can search the market and find different apps, both free and paid. The operating system handles everything for you, so once you find an app that you want and you click "Install," you won't have to do anything else.
If you log into Google Play online using your Google account (the same one you use for your device), then you can actually install straight to your device through your browser. Very convenient.
There are other app-downloading services and markets, like Amazon App Store, but they are another topic altogether.

13. How do I install a new ROM on Android?

Our very own Ryan Dube actually wrote up a post detailing how you can install a custom ROM on your Android device. Be aware, however, that ROM installation is an advanced topic and doing it incorrectly could render your phone bricked.
What is "bricked," you ask? It means your phone no longer starts up, making it no more useful than a paperweight. A brick, you could say. For more on Android-related terminology and jargon, check out this article with a mini Android glossary.
Hopefully these questions were pertinent to you and you have a better understanding of Android. If you have a question that wasn't answered here, feel free to ask it in the comments and I'll do my best to answer them.
Image Credit: Apple & Android Via cio.com.au

Friday, November 9, 2012

How to Install apks from computer directly.[for all android devices]


  1. Go to Setting of your android device
  2. then,Application
  3. then,Development
  4. make sure that USB debugging is connected ie clicked.
  5. Connect your device to computer
  6. now you just need to download small application in your computer
  7. here goes the link http://www.mediafire.com/?os4q4lhdnp9tgex
  8.  open the application
  9. drag the downloaded apks to marked area of below fig.
  10.  
  11. This image is captured after successfull installation of apk to my device. 
  12. Have fun guys.

Saturday, September 22, 2012

Antim Grahan Coming Up With Their 6th Studio Album

Antim Grahan is one of the biggest name in Nepali Black Metal scenario. There are already 5 full length albums in their name, which have already established them in the Nepali Rock Music arena.The Band is now working on their their 6th studio album which is supposed to be releasing this September.
Previous Album’s of the Band
  1. Forever Winter – (2004)
  2. Tales from the Darkened Wood- (2005)
  3. In Thy Ambiance of Malevolence – (2007)
  4. The Ruin of Immortals – (2009)
  5. Putrefaction Eternity – (2010)
The band seems quite satisfied as they have recently revealed that all the Drum works has been finished and also released their one of their album cover for their new album according to one of their fan page.

One of the album cover for the new album


you can also have t-shirt worth Rs.550 from Metal Shop - RB Complex Block B Shop No. 255. Tel - 014263288 Ext. 255. Mobile no. 9851135854!


Wednesday, September 19, 2012

How to Root your Android Device with SuperOneclick and Why you might want to ..


image
You’ve probably heard of people “rooting” their Android phones. If you’ve ever wondered how to do that yourself – or wondered why people would bother – you’re in luck. You can root your Android in just a few minutes.
After rooting your device, you have full access to the entire system and can run special types of apps that require root permissions. These apps can disable bloatware, control app permissions, enable tethering, and do lots of other cool things.

What is “Root,” Anyway?

Android is based on Linux. On Linux and other UNIX-like operating systems, the root user is equivalent to the Administrator user on Windows. The root user has access to the entire operating system and can do anything. By default, you don’t have root access to your Android device, and certain apps won’t function without root access.
With root access, you can disable the bloatware that comes with your phone, manually deny app permissions, run a firewall, access the entire file system, or tether your device, even if tethering functionality has been disabled. You’ll find many apps that require root access in the Google Play store (formerly known as the Android Market), although they won’t function until you root your device.
Rooting isn’t mandatory – you only need to root your device if you want to do things that require root access.

Warnings

Before you root your Android phone or tablet, there are a few things you should be aware of:
Warranty – Some manufacturers assert that rooting voids your device’s warranty. However, rooting will not actually damage your hardware. You can “unroot” your device and manufacturers won’t be able to tell if it’s been rooted.
Security – Google Wallet, in particular, has a vulnerability on rooted devices that could allow other apps to access your PIN and other wallet information.  Google Wallet displays a warning message if you run it on a rooted device. If you’re one of the few people using Google Wallet for NFC payments, you may want to reconsider rooting your device.
Bricking – Rooting a device is a very safe process. However, there’s always some danger of “bricking” a device when you go outside the normal parameters and hack around with it — particularly if you’re trying to root a device or operating system version not supported by a tool. “Bricking” refers to breaking the device, making it about as useful as a brick. When you root, jailbreak, or install a custom ROM, or otherwise hack around, you do so at your own risk. It’s a good idea to do a little bit of research first and see if other people report success rooting your device.

Setup

The actual rooting process itself should only take a single click. However, you’ll need to do a few quick things first:
Download and install the Java JDK and Android SDK on your computer before continuing. Java must be installed before the Android SDK.
Enable USB debugging on your Android. On the device, go into the Settings screen, tapApplications, tap Development, and enable the USB debugging check box.
Connect your Android to your computer using its included USB cable. Don’t mount the device’s SD card on your computer – just plug it in.
You’ll also need the USB drivers for your phone or tablet installed. SuperOneClick itself should be able to automatically install the appropriate drivers – however, if this fails, you’ll need to download and install the appropriate drivers from the device manufacturer’s website.

Rooting With SuperOneClick

We’ll be rooting with SuperOneClick here. It’s a single-click way to root that supports a wide variety of different devices and should work for most people. If SuperOneClick doesn’t support your Android device, head over to the Android Development and Hacking forums at XDA Developers. There are subforums for most Android devices – type your device’s name into the search box and you’ll probably find information from other people that have successfully rooted it, perhaps by using another tool.
You can find download links for SuperOneClick at shortfuse.org, SuperOneClick’s official website. After downloading it, run the SuperOneClick.exe application.
Click the Root button in the SuperOneClick window and SuperOneClick should do the rest.
The process will take a few minutes. If you run into a problem, you might want to check the XDA Developers forum for your device, which we mentioned above, or run a Google search.
Restart your Android after rooting it.

Superuser

SuperOneClick automatically installs the SuperUser binary, which is also available from Google Play. Whenever an app on your device attempts to gain root permissions by calling the su command (just like calling the su command on Linux) you’ll be prompted to allow or deny the request.
Open the Superuser app to control the saved permissions and configure Superuser.

Now you’re free to install and use apps that require root access. We’ll have more coverage of things you can do with a rooted Android in the near future.

Saturday, August 11, 2012

EXCLUSIVE] Google Ears Music Recognition App for ICS devices [Free Download]

Android JellyBean
Google Ear

Apparently, alongside Jelly Bean, Google has also introduced the Google Ears app at I/O 2012. You can get this Amazing App Right Now on you Android Smartphone running 4.0/4.0.1/4.0.3/4.1.1 Ice Cream Sandwich.

Google Ear
Google Ears is listening to the Song

Google Ears is a Shazam or SoundHound-like service, which analyzes the music coming from your surroundings and tells you the artist and name of the song, as well as some other info about it. Among other things, it also let's you buy the song quickly, if it's available on the Google Play Store.


Google Ear
Google Ears Found the Song

We've tested the App ourselves on our ICS device (Galaxy S3) and its working good and the searching for songs is SUPER FAST and Accurate!


How to Install Google Ears ?


  • Download Google Ears (APK) from link below.

Download Google Ears


  • Once you've downloaded the Google Ears apk, you need to copy it over to your device's internal storage, in case you didn't download it with your phone.
  • Check that you have the allowed the installation of apps from "unknown sources". This option is usually in Settings -> Applications, or Settings -> Security.
  • Install the application by navigating to its location using the file explorer and launching the .apk file.
  • Put the "Google Sound Search widget" on your homescreen, play a song, and let Google Ear hear it (internet connection required).

Thursday, August 2, 2012

How to make Windows 7 bootable USB pendrive

I googled up the way to make a bootable pendrive and finally found the solution. Here I have posted the way  to make a bootable pendrive. Enough talking lets get started.

Things you would need


  • Pen drive (8 GB ==> I prefer & make sure its empty)
  • Windows 7 DVD (or .iso files)
  • Computer with windows installed and DVD drive(or friends Computer)
  • Cup of coffee(Trust me you will need this)
After you have grabbed all your equipment, Here are the real steps.
  1. Open command prompt (click windows+R and type 'cmd' and run)
You will get this screen
    2. Then type diskpart and hit enter. A new window as below will open. You can close our old command prompt now.
    3. Now the main game begins. Insert you pendrive and type list disk. This will show all the storage disk that is currently available as below.
   4. Usually Disk 2 will be your pendrive. It is obvious because other storage disk are heck too big for a pendrive.
5. Now type select Disk 2 and press enter. Be sure that you have selected your pendrive. You can check this by typing detail disk and it will show you details of that disk as below.
6.  Finally these commands should be typed serially. Don't mess the order.
  • clean
  • create partition primary
  • select partition 1
  • active
  • format fs=fat32
As you might have figured out what we have done right now. Ya we just formatted our pendrive, that is why I wanted you make sure that it is empty or else you might loosed your important files like I did.
Now take a cup of coffee (I told ya'). and open take rest.(You deserve it).
8.  After the format is complete, type following commands
  • assign
  • exit
Below is the image of our complete process.
9.  When the format is complete insert your original windows DVD in your DVD drive (No doubt you can use .iso image if you have from softwares like VMware, PoweISO, etc)
Then copy all files from the DVD into your dear pen drive and treat yourself a nice nap after that long hard work. 
Feel Free to post any comment or feedbacks. I would be happy to here from you.

Tuesday, July 31, 2012

Best way to have Nepali or Hindi font in your andorid.

a)  First your android must be rooted.
b)  You have to download Root file explorer from Play Store.
c) Download the required font in this link. (361kb)
d)  Copy this downloaded font to /system/fonts in sdcard from root file explorer.
e)  Restart your phone. Change is found,
f)  To type Nepali , You can download Multiling Language Keyboard from Play store,
g)  Happy Nepali browsing and Typing.

Setting up MySQL on Cloudfoundry Building a Native (kind of) Android App using Grails, HTML 5, CSS, Javescript hosted on CloudFoundry Integrating AdMob in your Android App and make money

As an android developer, I write android apps and publish them on the market mostly for free as I try to build a reputation :) . But, wouldn’t it be great if I could offer my app for free at the same time make some $$ through “Advertisement”? In this post I will go through integrating AdMob in an android application and start making some money (at least few cents ;) ).
If you want to learn more about AdMob, please visit their website http://www.admob.com/

Let’s get started:
Step 1: Registering with AdMob
First of all you need to register yourself with AdMob. You can do this by simply clicking on “Register” Link when you visit “www.admob.com”.
You can find more info about registration in http://developer.admob.com/wiki/PublisherSetup
Step 2: Setting up AdMob with your App
Once you are registred, login to the site and follow link to http://www.admob.com/appdevs You can get here by clicking on “Android” Icon on the homepage. (At the time of this writing AdMob website has an icon in the center of the page that features, iPhone, Android etc, I assume that link above should still work.)
i. Click on “Get Started” and then click on “Sites & Apps”. You can follow the link http://www.admob.com/my_sites/
ii. Click on “Add Site/App” button, this should take you to a setup wizard. In this example we will be working on an android app. Click on “Android App”
iii. Provide the Details. Put your app name under “App Name” (In this example I used “Demo”), As this is a new app and we haven’t published the app yet, you can put your website in the “Android Package URL”. (This is a required filed, so you have have something here). Select a category and add description and click “Continue”.
iv. Thats it you have successfully set up your “App” on AdMob. (You will see a page from where you should be able to download the admob library, if you do this now, you can skip Step 3 below.)

Step 3: Getting the AdMob library jar
If you did not download the jar that you saw at the end of Step 2. You can still get there by navigating to http://www.admob.com/my_sites/ You should see the app you registered in Step 2.  If you hover over the app name, you should see “Manage Settings”, Click on that. This should land you to a page from where you can get the library by clicking on “Get Publisher Code”.

Step 4: Setting up an Android App
 Let’s create an Android a Demo app. You can do this by going into Eclipse or any IDE with Android SDK and creating a new project.

Step 5: Adding the Library:
Once you have the android project set up create a directory called “libs”, and add the jar file you downloaded in step 3.

Now, go to the project properties by right clicking on the project name and clicking on “Properties”.  Go to “Java Build Path”, then on the right side, click on “Libraries” tab.
To add the jar, click on “Add JARs…” button and locate the Jar file in the libs folder in your project.

Step 6: Setting up a view
Since you added the lib and if you do not see any project problems you are all set. Now this should allow us to use a “AdView” in your android app. This is the view where AdMob will place a HTML5 advertisement.
There are two ways we can add this view, 1. in the Activity java code or 2. in the Layout XML. For Simplicity, lets do the XML one.
If you have the project set up lets go to the main layout of the app found in “res>layout” directory in your project. Locate “main.xml”.
In the XML, Lets Copy Paste the following XML in your layout.
1<com.google.ads.AdView android:id="@+id/adView"
2                         android:layout_width="wrap_content"
3                         android:layout_height="wrap_content"
4                         ads:adUnitId="YOUR_PUBLISHER_ID HERE"
5                         ads:adSize="BANNER"
6                         ads:loadAdOnCreate="true"/>
Replace “YOUR_PUBLISHER_ID HERE”, with id you got while in Step 3.
Also, Include following namespace code int he Layout tag.
So your final code should look something like this
01<?xml version="1.0" encoding="utf-8"?>
02<LinearLayout xmlns:android="http://schemas.android.com/apk/res/android"
04    android:orientation="vertical"
05    android:layout_width="fill_parent"
06    android:layout_height="fill_parent"
07    >
08<TextView
09    android:layout_width="fill_parent"
10    android:layout_height="wrap_content"
11    android:text="@string/hello"
12    />
13    <com.google.ads.AdView android:id="@+id/adView"
14                         android:layout_width="wrap_content"
15                         android:layout_height="wrap_content"
16                         ads:adUnitId="a14e2f8fe3af5a6"
17                         ads:adSize="BANNER"
18                         ads:loadAdOnCreate="true"/>
19</LinearLayout>
Step 7: Setting the Manifest
AdMob requires internet and network access, so it can pull down the ad to display on your app. So, Lets update the AndroidManifest.xml.
Edit the AndroidManifest.xml file found in your project. Add Following Activity right below the current activity.
1<activity android:name="com.google.ads.AdActivity"
2          android:configChanges="keyboard|keyboardHidden|orientation"/>
And Now, add following permissions
1<uses-permission android:name="android.permission.INTERNET"/>
2    <uses-permission android:name="android.permission.ACCESS_NETWORK_STATE"/>
Your Manifest should look something like:
01<?xml version="1.0" encoding="utf-8"?>
02<manifest xmlns:android="http://schemas.android.com/apk/res/android"
03      package="com.novaapps.android.couponmanager"
04      android:versionCode="1"
05      android:versionName="1.0">
06 
07    <application android:icon="@drawable/icon" android:label="@string/app_name">
08        <activity android:name=".CouponManager"
09                  android:label="@string/app_name">
10            <intent-filter>
11                <action android:name="android.intent.action.MAIN" />
12                <category android:name="android.intent.category.LAUNCHER" />
13            </intent-filter>
14        </activity>
15 
16    <activity android:name="com.google.ads.AdActivity"
17              android:configChanges="keyboard|keyboardHidden|orientation"/>
18 
19    </application>
20 
21    <uses-permission android:name="android.permission.INTERNET"/>
22    <uses-permission android:name="android.permission.ACCESS_NETWORK_STATE"/>
23 
24</manifest>
Step 8: Done!
That’s it, now you can run your demo app and see the admob advertisement show up in your app!
(Note: It may take a while for the app to appear on the screen as it is being set up for the very first time, it should be faster in subsequent loads)

You can learn more Here:
http://code.google.com/mobile/ads/docs/android/fundamentals.html

 thank you Manij_Shrestha . copied from this link